![Untitled design (55).png]](https://help.yourhere.ca/hs-fs/hubfs/Untitled%20design%20(55).png?height=50&name=Untitled%20design%20(55).png)
I want to...
Adding a new Tenant:
In the side navigation bar, click Directory, then Tenants.

Click either "Add a new one?" or the add icon on the top right to start adding your new tenant.

You have the ability to add single or multiple tenants.
Single tenants:
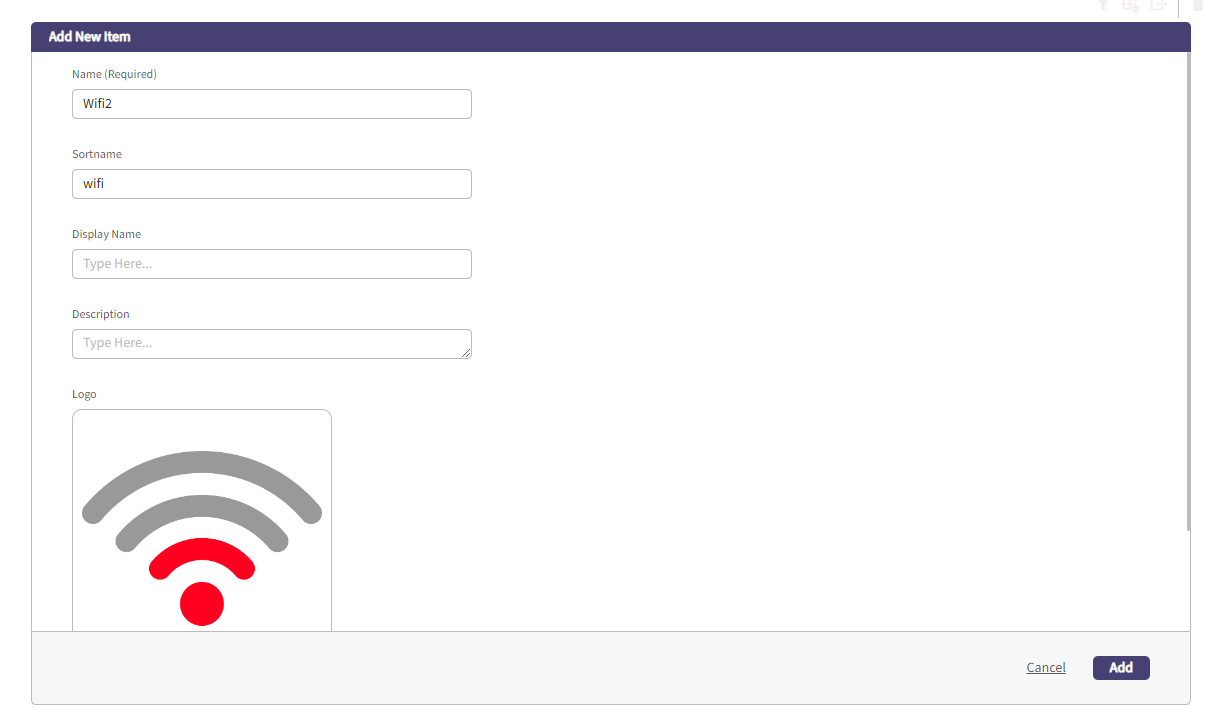
Follow the prompts to enter the new tenant's details.

In cases where you'd like to sort a tenant in the directory by something other than the first few letters, you can manually add a name in the Sortname field to sort by instead.

If the name you'd like to display the tenant by differs from the Name field, you can also enter that in the Display Name field. For example: A numbered company operating with a trade name, or a tenant that starts with "The" or another prefix.

You may want to add an additional description to a tenant.

If you have locations enabled, you can assign a location to your tenant as well by clicking in the Location field and clicking on the corresponding building, floor, and suite. Click Assign to confirm.

Note: If your software includes wayfinding, you may have to contact support if adding tenants to new suites on floors with integrated mapping direct to the suite.
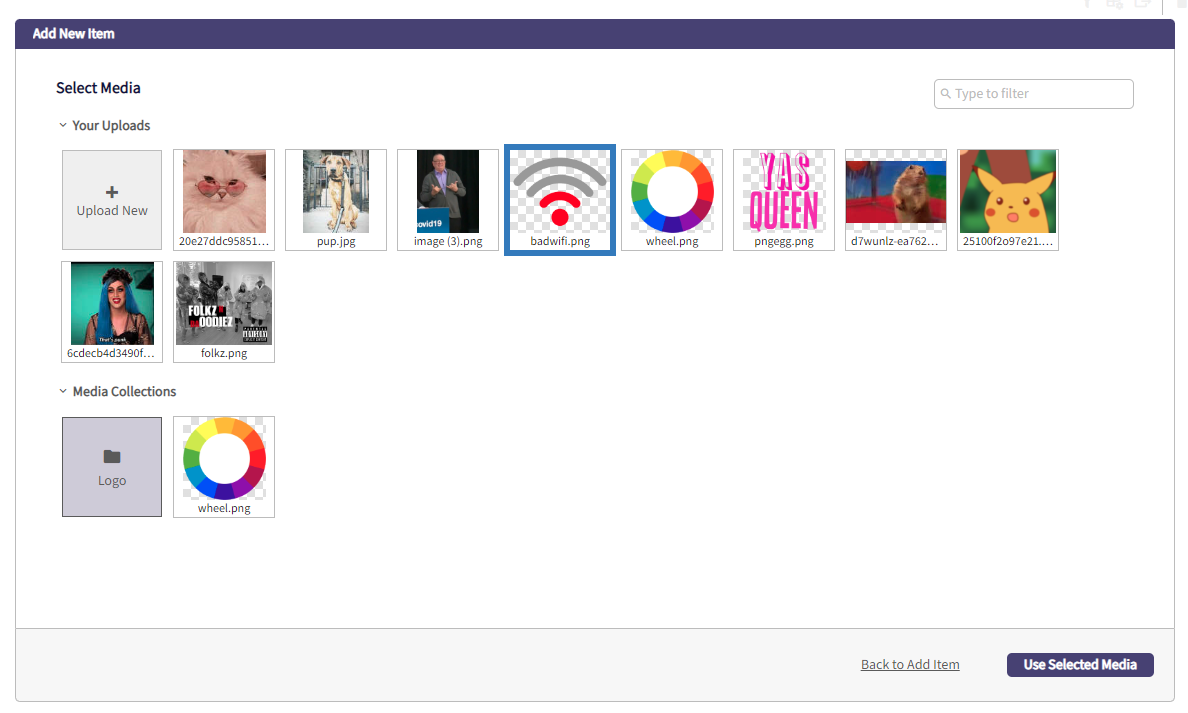
If applicable, you can choose a logo for the tenant.

Select New Media will bring up a media selector dialogue. Here you can add your desired media or choose from existing media uploaded for the property.
Once you're finished making changes, click Add to save. The new tenant will now show up in the tenant list. You can continue to add or edit, or if you are finished with entering tenants and need to access the data right away, you can click Publish Now to commit your changes. Please allow up to 60 minutes for changes to be synchronized to your on-site information hubs.

Adding multiple Tenants:
In the side navigation bar, click Directory, then Tenants.
Click either "Add a new one?" or the add icon on the top right to start adding your new tenant.

Select the Multiple tab at the top of the dialogue box.

Enter the tenant names, one per line. Click Add to confirm.
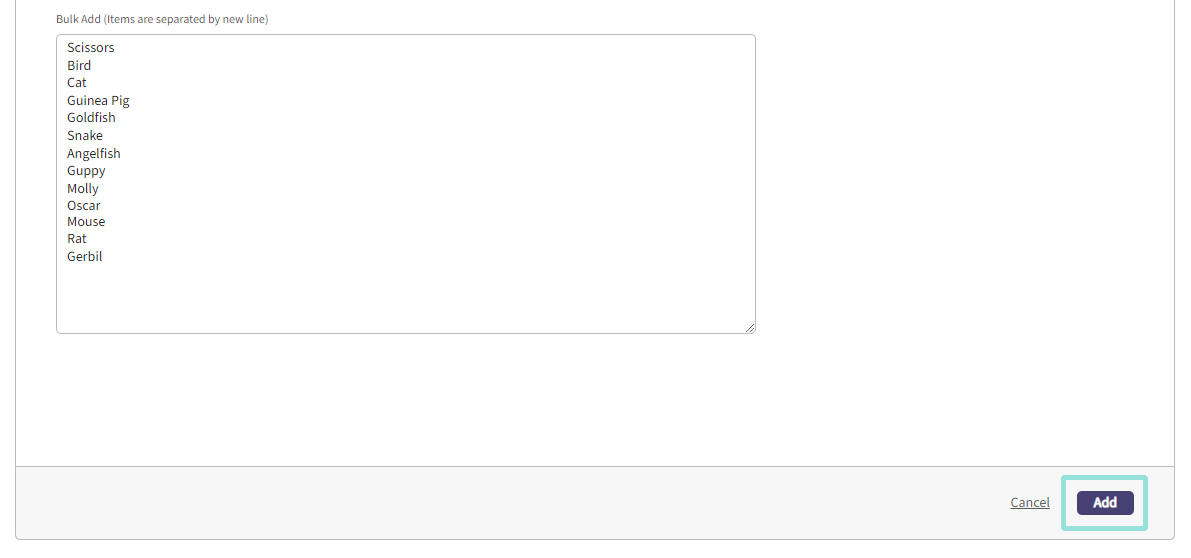
Note: When adding multiple tenants, we add the name field only. The individual tenants can be edited one-by-one, or in bulk in the next step.
Duplicating Tenants:
You can also Duplicate a tenant to save time when adding multiple similar tenants. You will have the option to change the information in any of the fields before saving.
Editing an existing Tenant:
In the side navigation bar, click Directory, then Tenants.
Single Tenant:
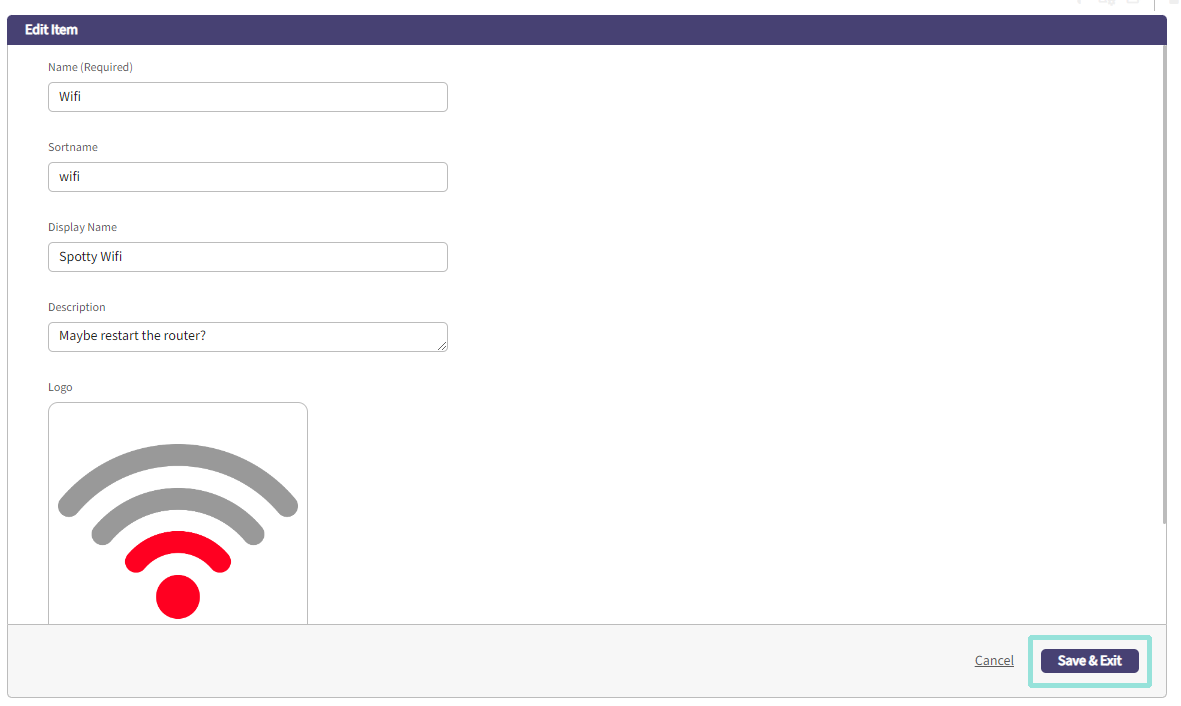
Click either the kebab or the add icon in the top right to start editing your chosen tenant.

Follow the prompts in the form to modify data you want to change for the tenant, and click Save & Exit to commit your changes.
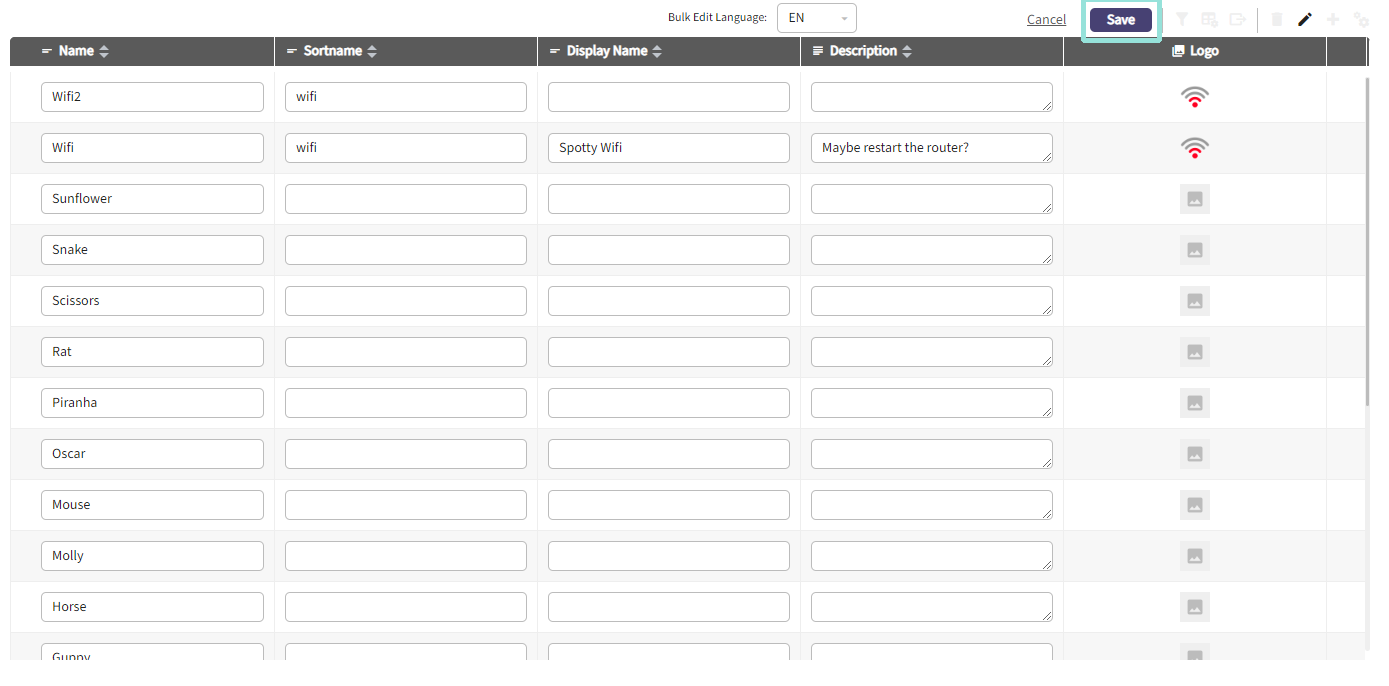
Editing multiple Tenants:
Click the Bulk Edit icon in the top right of the dialogue.

The fields in the list will become editable. Make your changes, then click Save to commit the changes.
Note: Logos and other media can only be edited in individual edit mode.
That's all! If you are finished working with tenants and need to access the data right away, you can click Publish Now to commit your changes. Please allow up to 60 minutes for changes to be synchronized to your on-site information hubs.

Removing a Tenant:
Single Tenant:
Click the kebab in line with the tenant you want to remove and select Delete.

Multiple Tenants:
Click the Bulk Delete icon in the top right of the dialogue.

The fields in the list will become editable. Make your changes, then click Save to commit the changes.

That's all! If you are finished working with tenants and need to access the data right away, you can click Publish Now to commit your changes. Please allow up to 60 minutes for changes to be synchronized to your on-site information hubs.
